The Wireless Access Point


Switches and wireless access points are available from Micro Plus.
Plug one end of the Ethernet cable into the WAP, and the other end into your switch (if you have one).
If you need to unplug Ethernet cables, be aware that they don't just pull out - there is a little plastic nib on the side that you need to squeeze to release it. Have a look at a new cable - you should be able to see the nib clearly (and it will probably be a lot easier to see than the back of your computer, if it's anything like mine!).
[If you only want wireless connections, and don't have any fixed devices, you can plug the cable directly into the broadband power supply connector box. Most are black boxes, as shown on the left. They have 3 connections - the power cable, the wire to the outside antenna (marked OUT or POE) and the wire to the WAP (marked IN or LAN).]
Then plug in the power supply, and turn it on. The lights on the front should all come on, or flash.


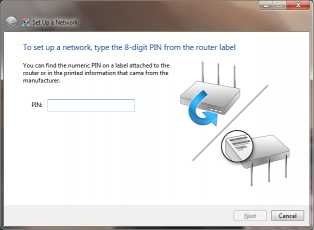
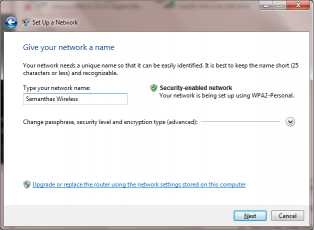
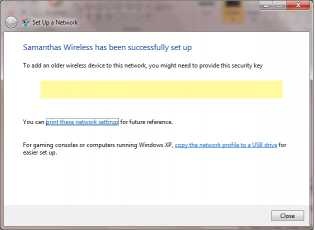
Click on the wireless icon at the bottom left of your screen. It should offer to set up your WAP for you. Click on the setup link, and you should see something like screen 1 (left), asking for the WAP PIN. This is on the label on the bottom of the WAP (see right). Then you get to name your network (screen 2, left) - give it a name you will recognise later. Once you click Next here, Windows 7 will set up the WAP, then show screen 3 (right). In the area in the middle will be the network security key - you need this to access your network in future - write it down carefully now and put it in a safe place. That's a safe place you will remember to look in next time you want to connect another laptop, not the kind of safe place I usually choose, which is the last place I would look!
Now check your laptop can see the Internet.
If you want to connect any other laptops, smartphones, XBoxes, etc. to your wireless connection, you must choose WPA encryption when asked for security type. When asked for a shared key or password, type in the network security key you wrote down.
It is very important to set up WPA security on your wireless network in this way - if you don't, anyone in range can use your Internet connection. This doesn't seem like a big problem, but if they used your connection for something illegal, you could easily be blamed. Having all your computers confiscated while you are investigated by the police would not be good.